Installing the RESOLVE Compiler/Verifier on Windows
Now that the three RESOLVE files (antlr.jar,
Resolve09.jar, and workspace.zip) and the JDK have been downloaded, the program
can be installed on a Windows-based computer. These instruction are based on
a computer running Windows Vista Business, but the steps are similar for other
version of the operating system.
SPECIAL NOTE:
If the antlr and workspace files were identified and downloaded as zip
files instead of jar files (which may happen, depending on what web browser was used
to download them) they must be renamed from to ".zip" to ".jar".
Visit THIS PAGE for detailed instructions on how to rename
the files.
To determine if Java is already installed, open up a
command prompt and type "java -version." The example below
illustrates a system with Java not installed.

This next image shows a system with the latest version of the
JRE installed.

If the JRE is not found, go ahead and install the JDK, which will
install both the JRE and the JDK, including the Java compiler.
If the JRE is found, it is necessary to check the installation
folder to see if the JDK is also already installed. The default directory
for Java is:
C:\Program Files\Java
Browse to that folder to and see what that it contains. Here's what
it should look like:
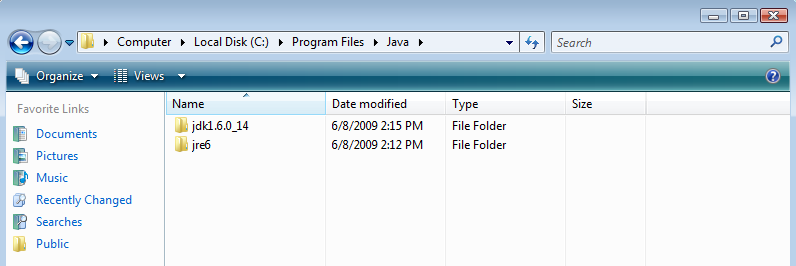
If there are two folders (jre6 and jdk1.6.0_13 in the example), the system
is almost ready for RESOLVE to be installed. If the only folder is jre6, install
the JDK downloaded earlier.
Installing the RESOLVE files
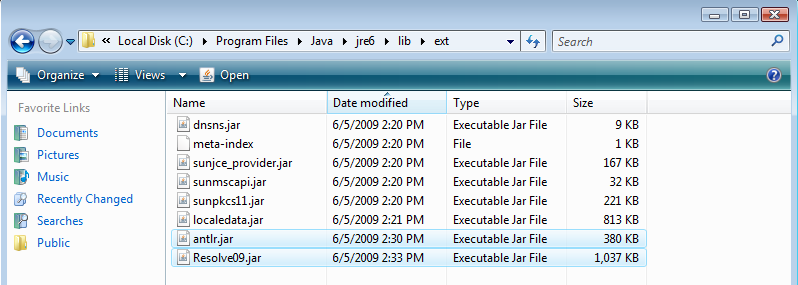
All that is needed to install the RESOLVE Compiler/Verifier is
to copy the two jar files into the JRE installation directory.
Open a window and navigate to the location where they were downloaded
(C:\Users\resolve\Downloads in this example), copy the files, and
paste them into the JRE extension directory:
C:\Program Files\Java\jre6\lib\ext
Now unzip the workspace.zip file to a directory of your choice.
In this example it was just extracted to the Downloads folder and is located at:
C:\Users\resolve\Downloads\workspace
Setting Environment Variables
There are a few additional steps that must be taken at this point. Windows
may not recognize the commands unless the path to the executables are
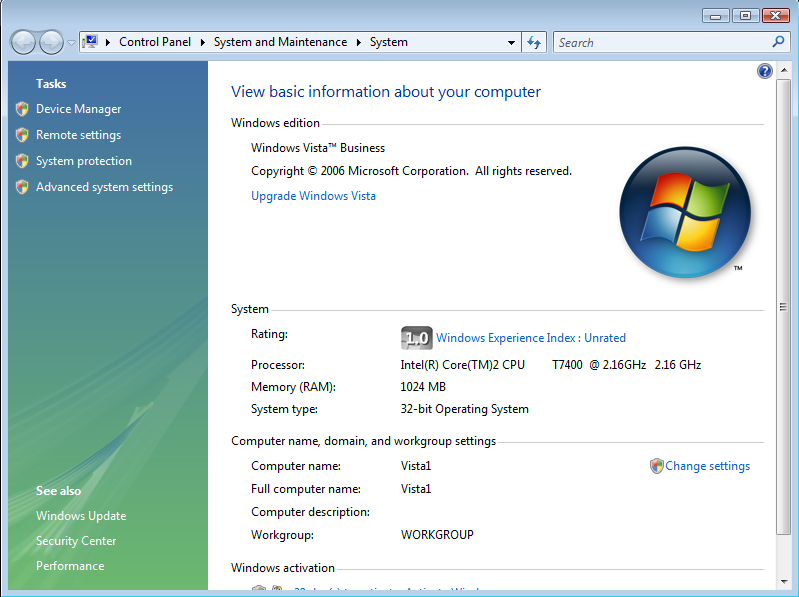
specified in the Environment Variables. The first step is to open up the
Control Panel, click "System and Maintenance", then click "System". Now click
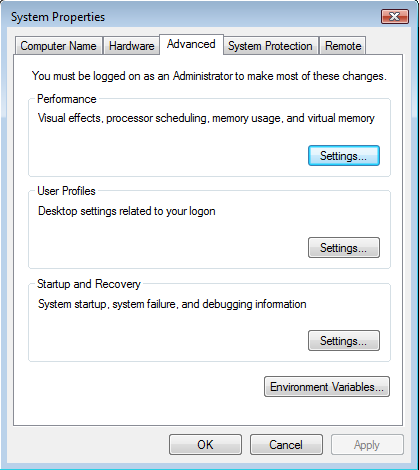
"Advanced system settings" on the left side of the window, as seen below:
This will bring up the System Properties. From there click "Environment Variables."
That should bring up the Environment Variables screen, as shown below.
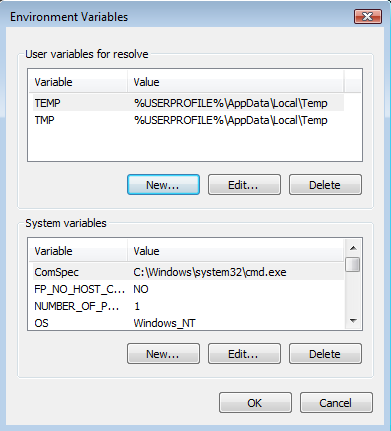
Look in the user variables box near the top for a variable called path.
If it is there highlight it and click "Edit," otherwise click "New." If a
new variable was created, type "Path" in the Variable name textbox:
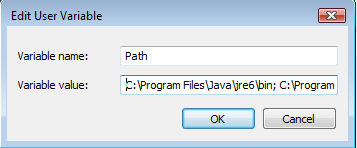
NOTE: If the path was just created, the Variable value box will be empty
If the Variable value box is not empty position the cursor at the end the text
inside the box and add a semicolon(;), otherwise just put the cursor in the
empty textbox. This is where the location of the Java compiler, the Java
libraries, and the RESOLVE workspace directory need to be entered. Type or copy and
paste these locations into the values textbox:
C:\Program Files\Java\jdk1.6.0_14\bin; C:\Program Files\Java\jre6\lib;
C:\Users\resolve\Downloads\workspace
Next, the RESOLVE workspace directory must be entered into the user
CLASSPATH variable so Java knows where to look for the classes. If there
is a CLASSPATH variable click "Edit," otherwise click "New" and type "CLASSPATH"
into the Variable name textbox:
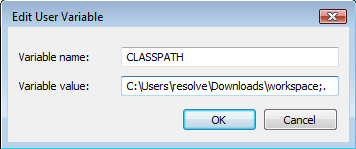
NOTE: If the CLASSPATH was just created, the Variable value box will be empty
Type or copy and paste the location of the RESOLVE workspace directory into the
Variable value textbox:
C:\Users\resolve\Downloads\workspace;.
Notice that a semicolon and period (;.) were added after the
workspace directory. This will allow Java to check the current working
directory for classes. It is also a good idea to add the RESOLVE workspace
directory location to the System Path and CLASSPATH variables. Follow the
procedures as above to edit or create (if necessary) the System Path
and CLASSPATH variables. This time just add the workspace directory and
current directory (C:\Users\resolve\Downloads\workspace;.) to the
variables. Once that is completed the Environment Variables and System Properties
windows can be closed and the Java compiler can be checked. Open
up a Command Prompt and type "javac -version" into the window.

If the command displays the current verion of javac, the system is
ready go. If it returns "not recognized" or "Exception in thread
"main" java.lang.NoClassDefFoundError" double-check that
the locations entered into the User and System Path and CLASSPATH
variables are correct.
Now that the RESOLVE compiler/verifier has been installed and configured,
click HERE to see how to use RESOLVE from
the command line.
Eclipse IDE/RESOLVE Plugin
There is a plugin available that allow users to use the Eclipse
Integrated Development Environment to create and compile or verify
RESOLVE files. The IDE is the same for both Windows and Unix, so
click HERE for detailed installation
instructions.
|